Projects and Repositories
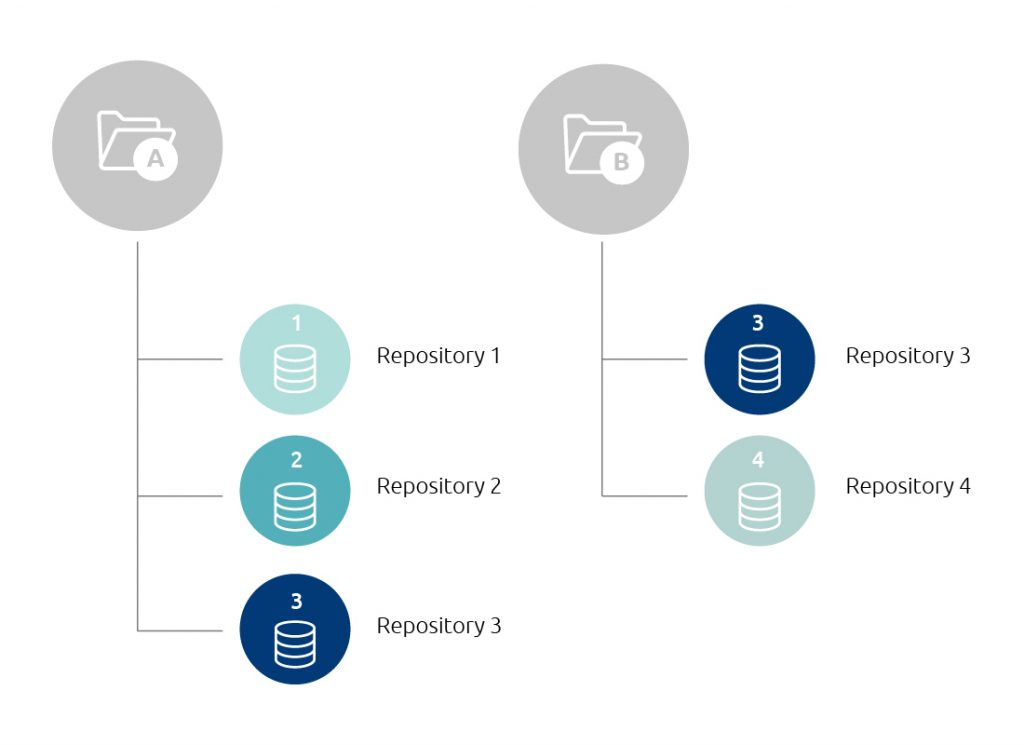
BrowserStack Code Quality organises repositories into projects. One repository can be linked to multiple projects at the same time.
BrowserStack Code Quality accepts following repository standards:
- *Git
- *Apache Subversion (SVN)
- GitHub
- Bitbucket
- *TFS
*Currently only supported on BrowserStack Code Quality Version 1. Coming soon on Version 2( V2)
Create a project
Steps to create a project on BrowserStack Code Quality :
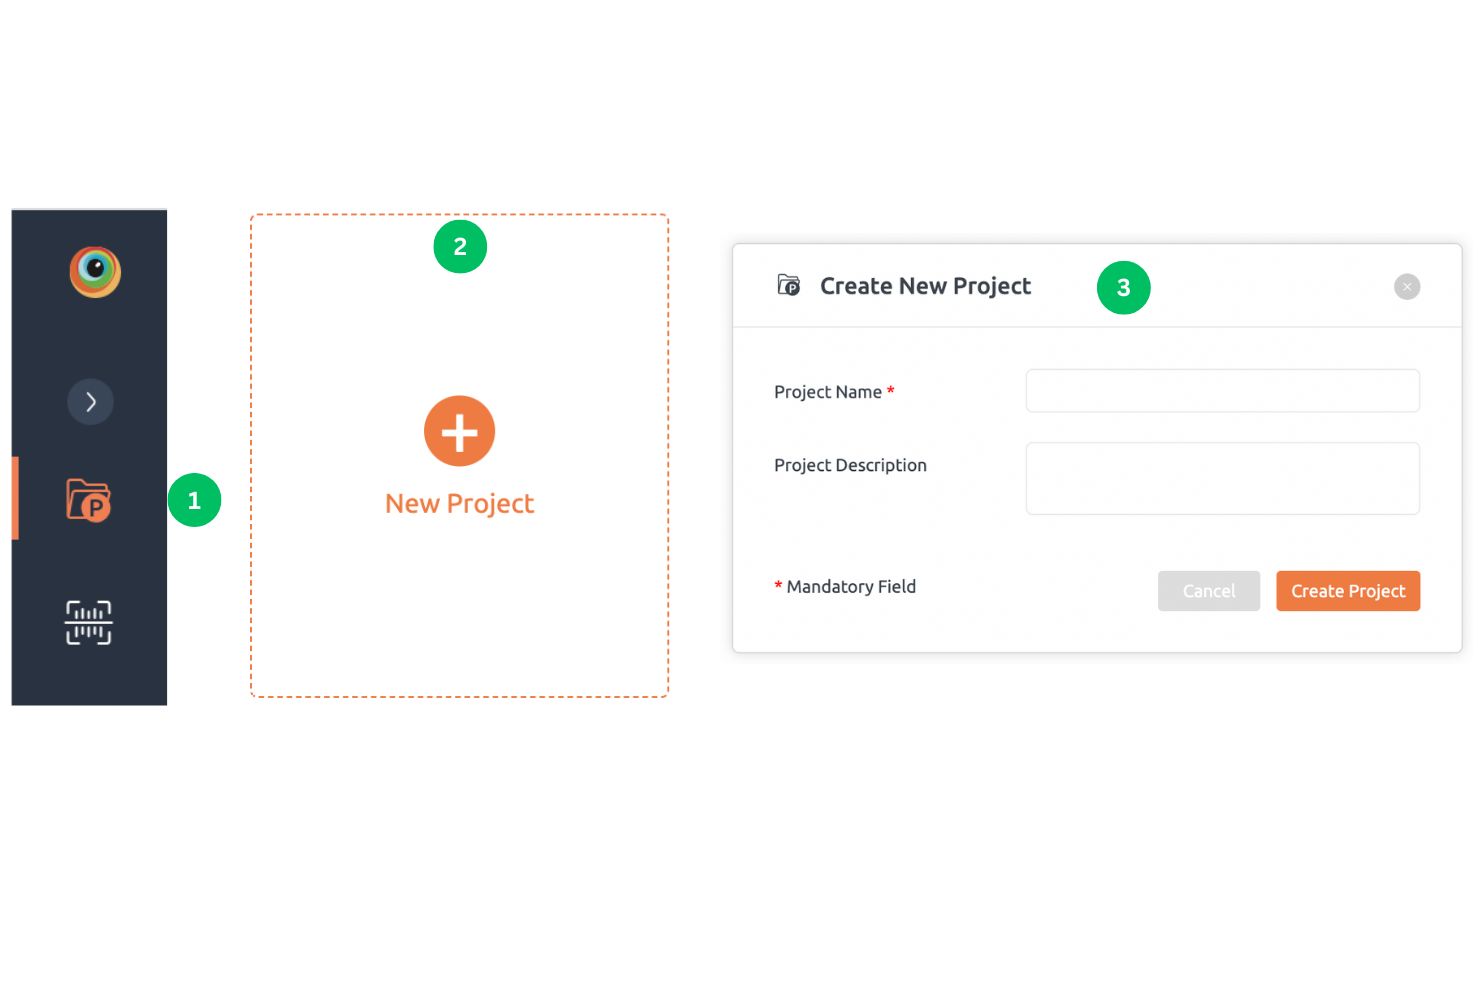
N avigate to the Projects page.- Click Create A New Project button or New Project tile.
- Fill the project name and description in Create New Project pop-up and click Create Project button.
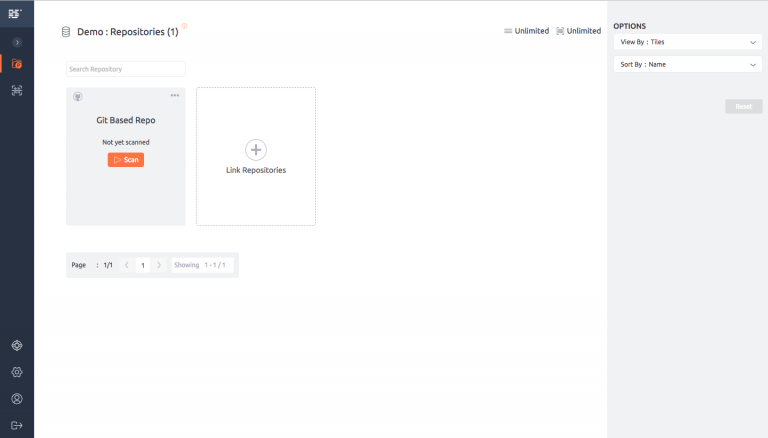
- Your new project will be now listed under projects. You may continue to link repositories to your new project.
Link a repository to project
Steps to link a repository to your project:
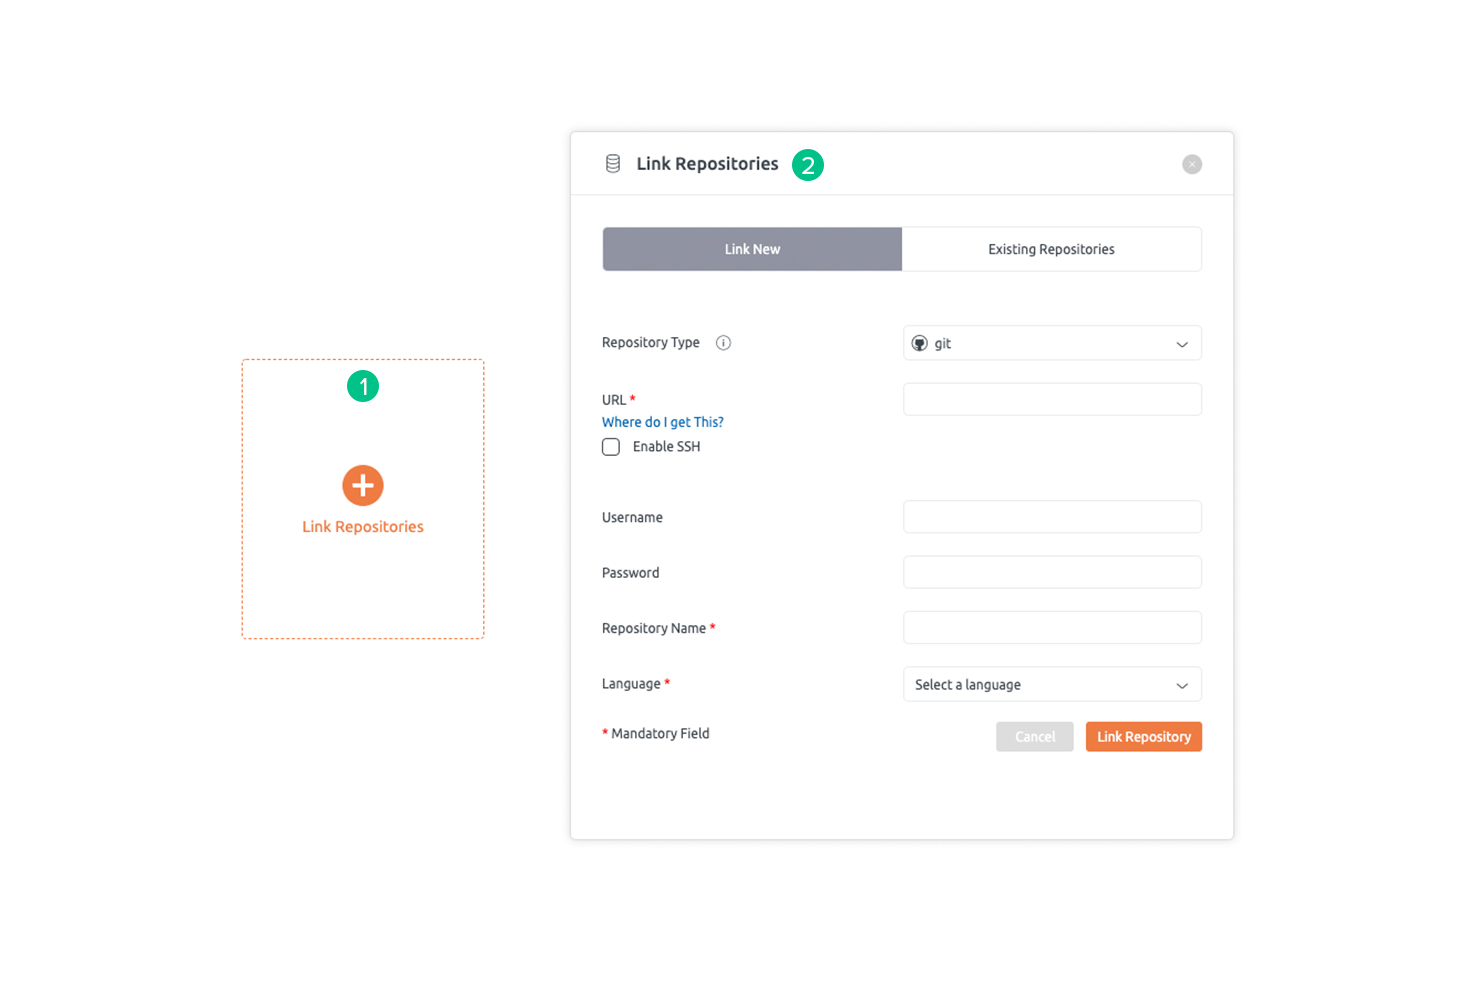
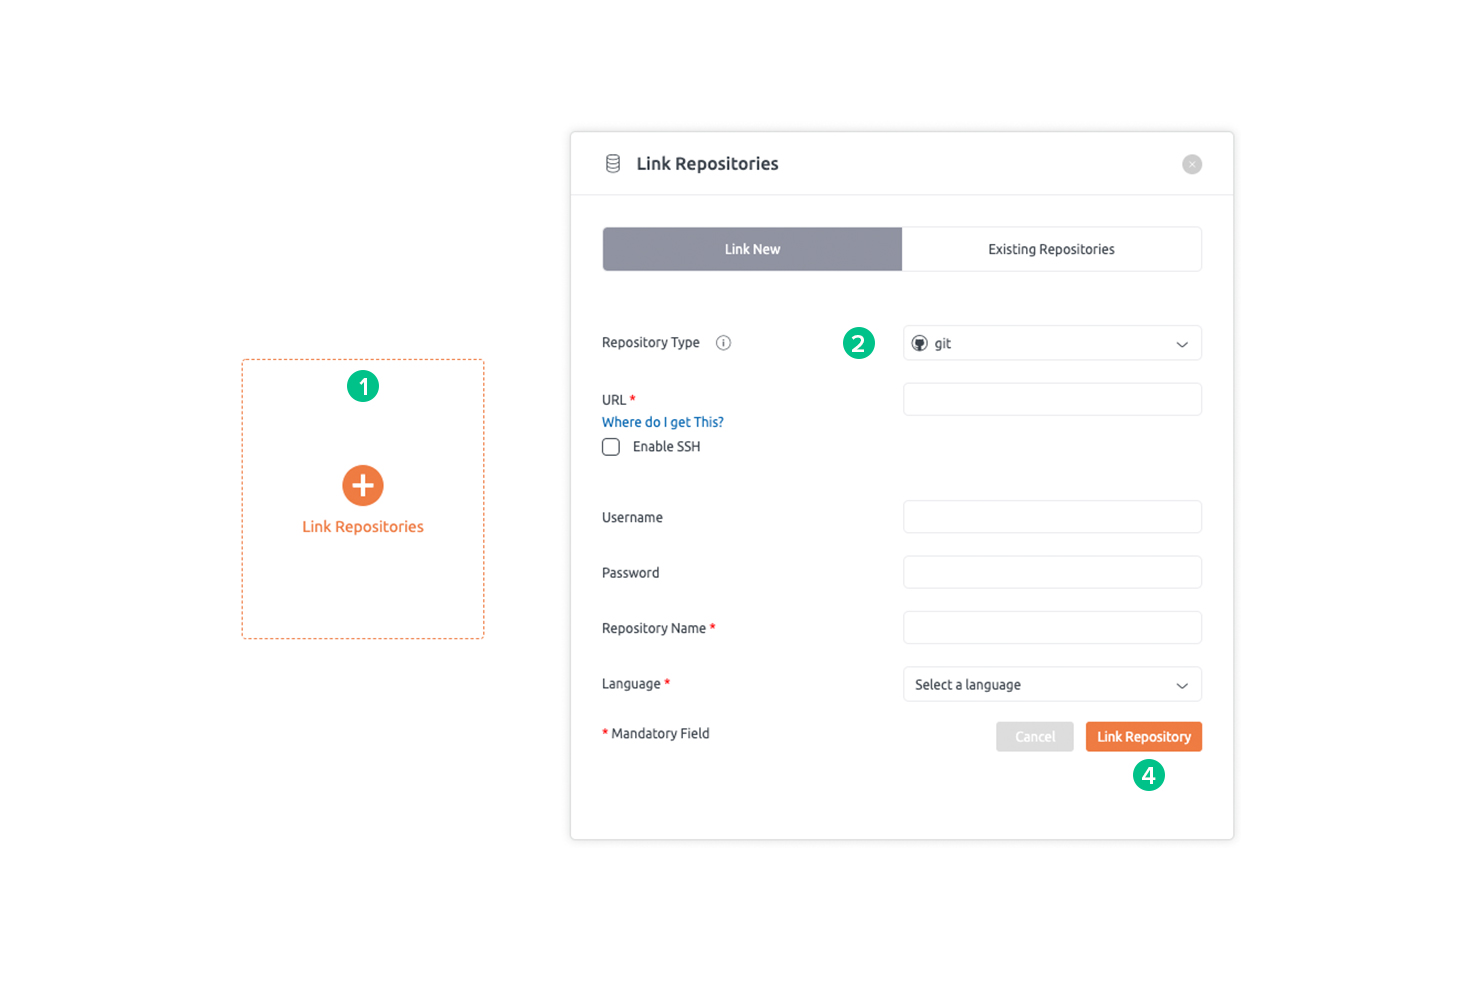
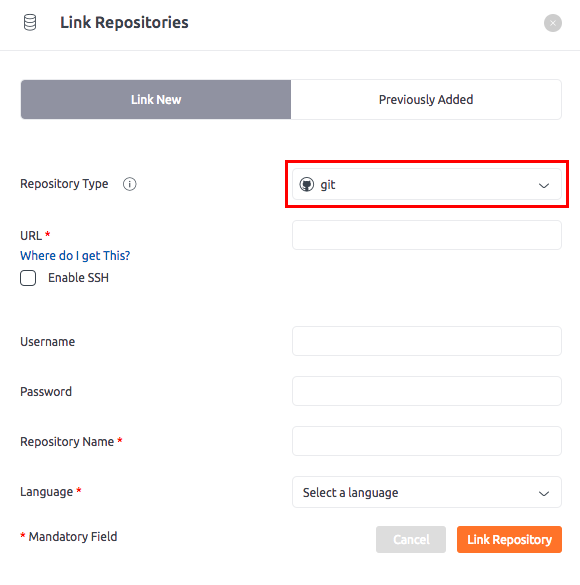
Inside your project, click Link Repositories tile. You have to click Link Repositories button on the project tile, if there is no repositories linked to the project yet.- In the Link Repositories pop-up, under Link New tab, fill the form and click Link Repository button.
- Alternatively you can choose to link previously linked (to other projects) repositories by selecting Previously Added tab
Unlink a repository to project
Steps to unlink a repository to your project:
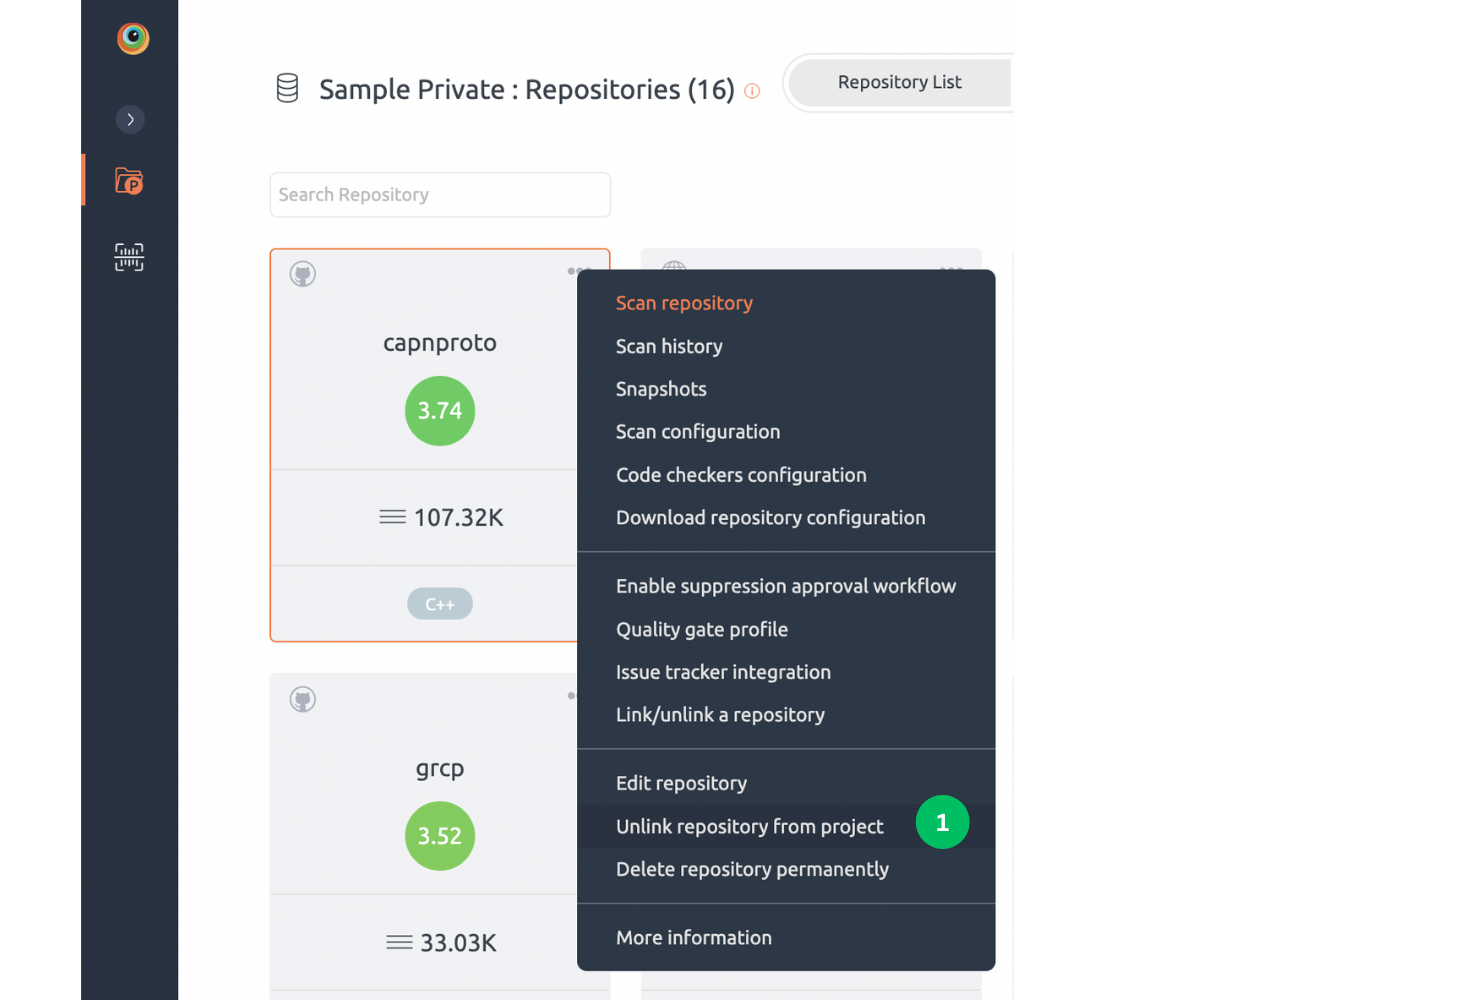
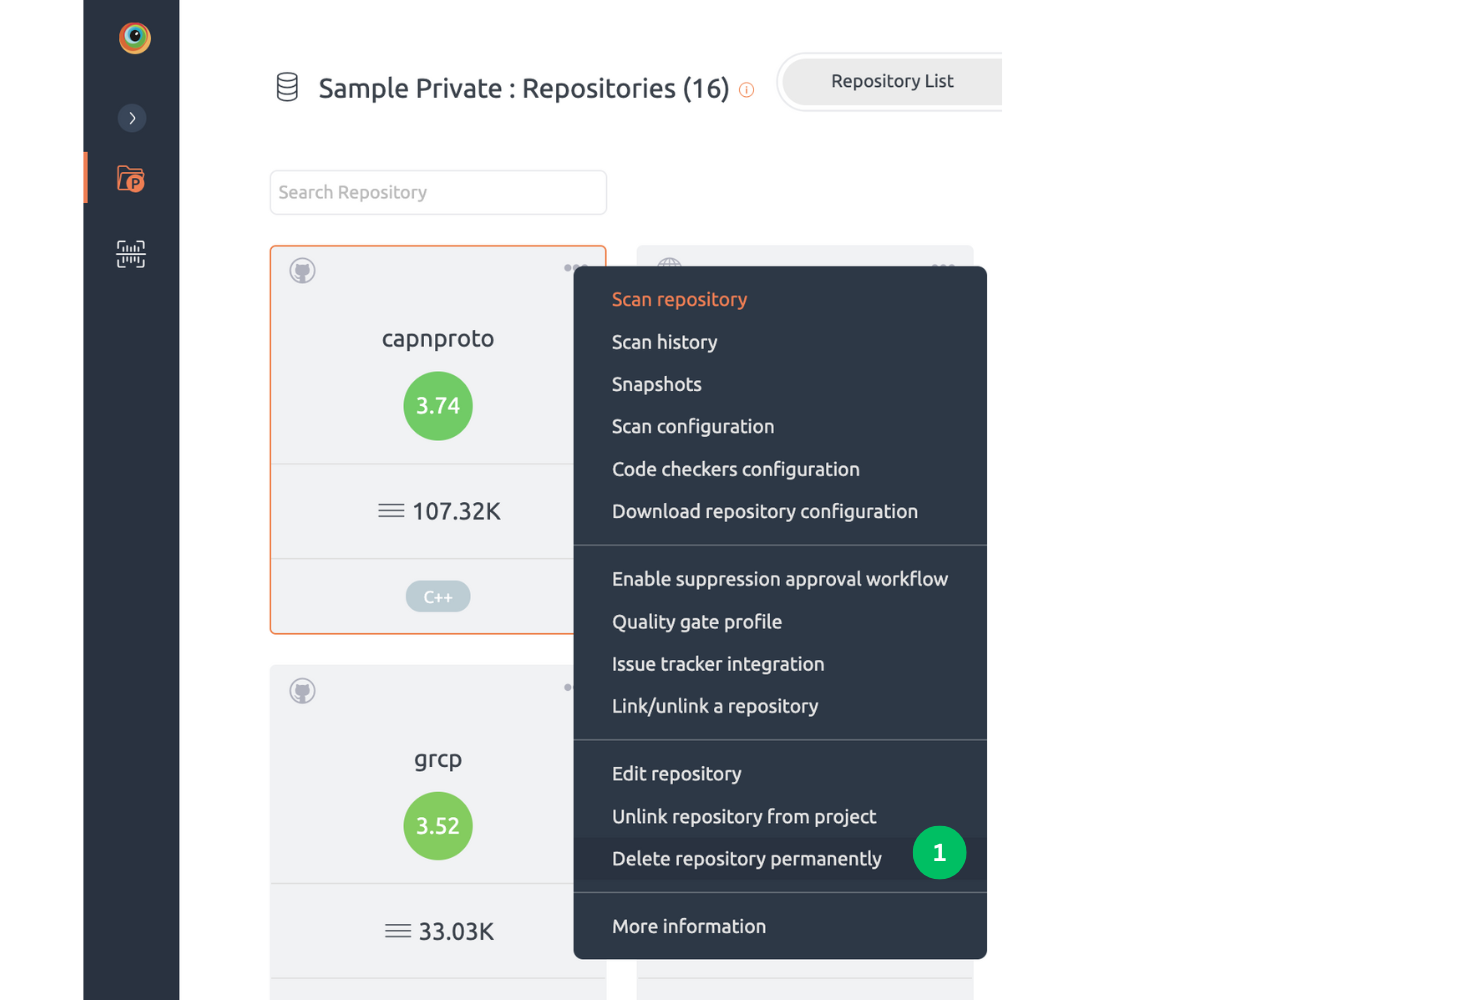
- Inside your project, click on a repository and three dots on the top right corner. Click on the Unlink repository from project button.
- Warning message will appear to the user for the confirmation of unlinking the repository.
- Hence, the repository will not be linked to the project.
Delete a repository from a project
Steps to delete a repository from your project:
- Inside your project, click on a repository and three dots on the top right corner. Click on the Delete repository permanently button.
- A warning message will appear to the user for the confirmation of deleting the repository.
- Hence, the repository will be permanently deleted from all the linked projects and no longer visible to the user. Moreover, all the on-going scans will be aborted.
Get Repository UID
Steps to get repository UID from repository dashboard
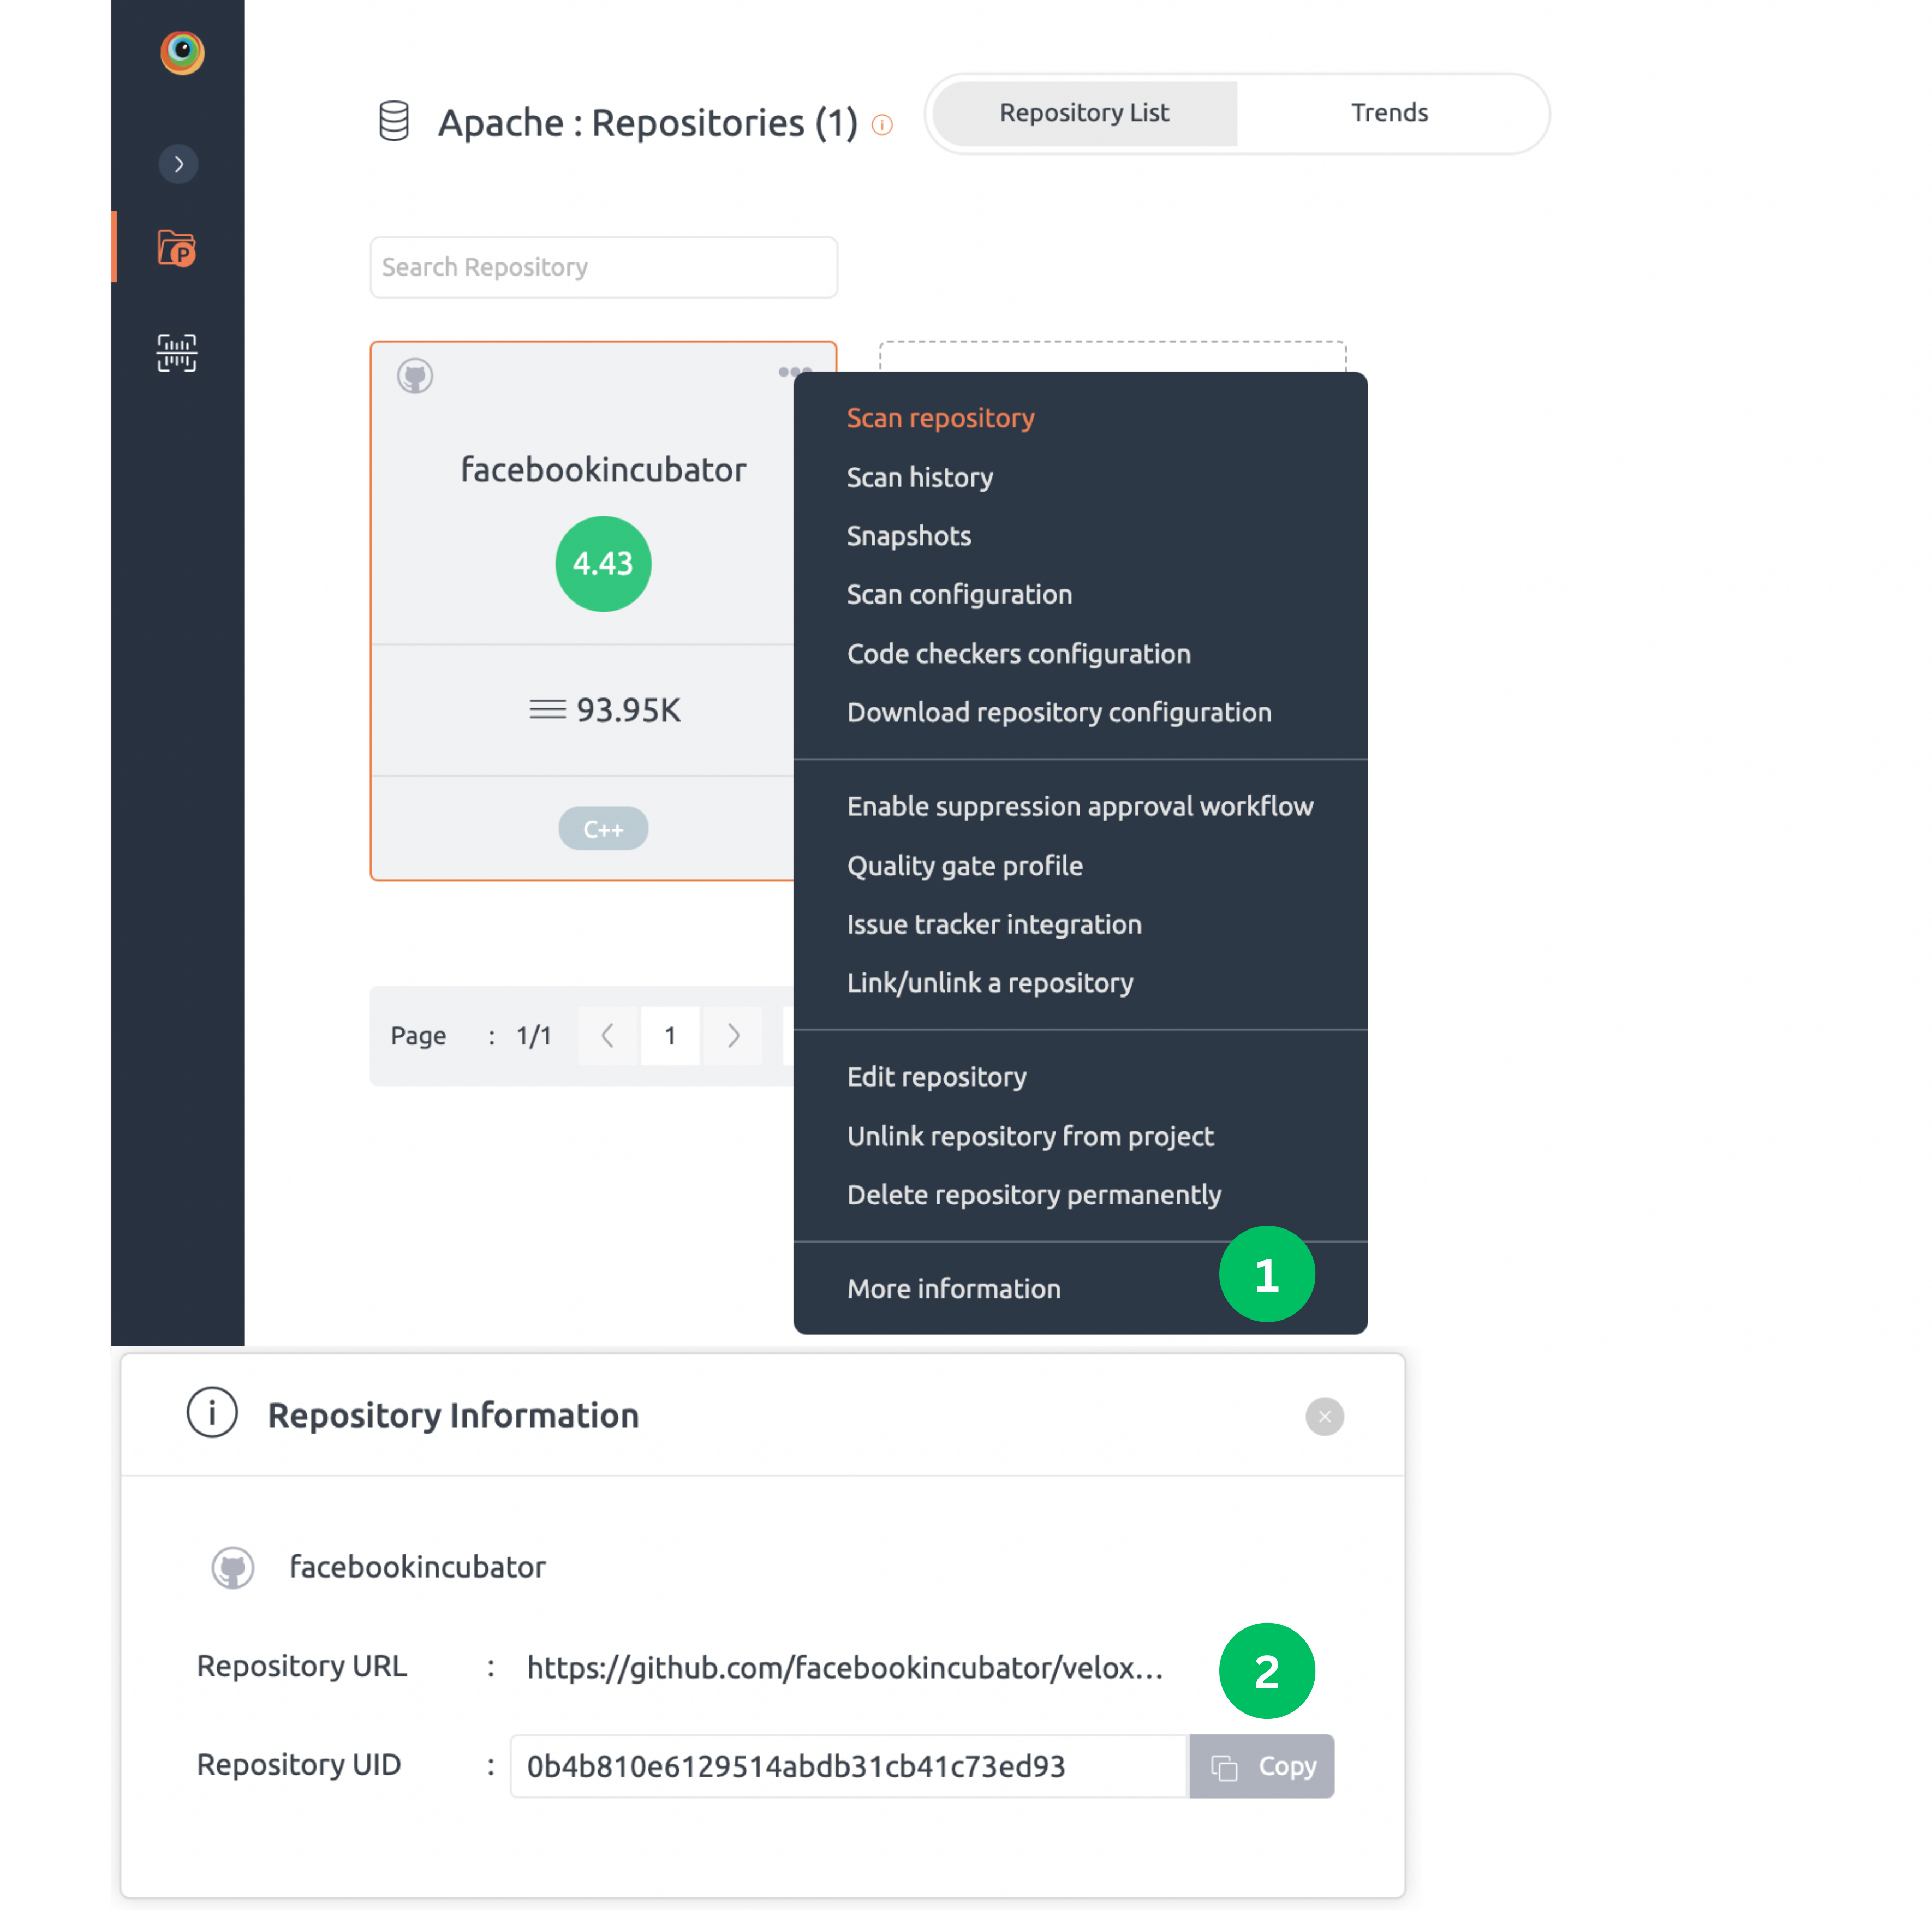
- Inside your project, click on a repository and three dots on the top right corner. Click on the More Information button.
- From the Repository Information pop-up, copy that Repository UID and paste it appropriately while filling repository details on the server.
Using Git SSH to link repositories
Pre-requisites :
- You should have SSH keys (Public key need to be added to GitHub or Bitbucket account)generated on the server where you have installed BrowserStack Code Quality
- The resulting public key should be added to the remote Git repository (GitHub or Bitbucket)
- Reference for Linux SSH: Documentation on generating SSH key
- Reference for Windows SSH: Documentation on generating SSH key
Steps to link a repository using Git SSH:
- Open Link Repositories popup.
- Select Git as a repository type.
- Provide repository Git URL in URL field in correct format (eg: git@github.com:apache/maven.git)
- Check Enable SSH option.
- Provide RSA private key generated on the BrowserStack Code Quality server in SSH Key field. Make sure to copy the entire text!
- Provide passphrase if any.
- Type in a repository name of your choice in the Repository Name field.
- Select the language for which you would like to scan.
- Click Link Repository button to complete the linking.

Pull request workflow is not supported for SSH.
BrowserStack Code Quality supports RSA PRIVATE KEY for linking SSH based repository.
SSH for Linux
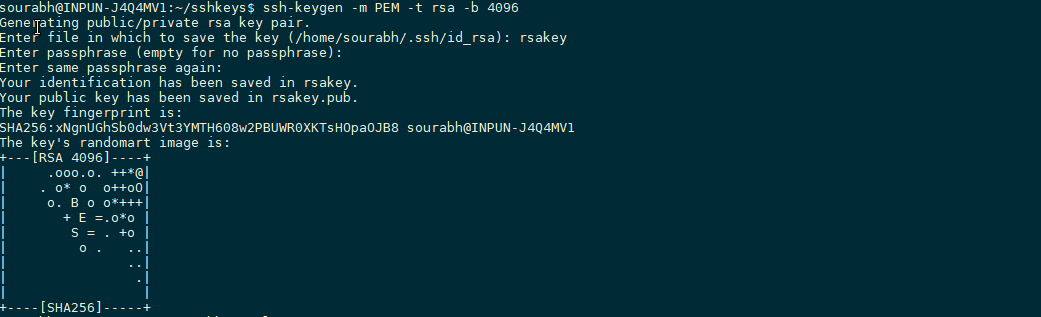
Below are steps to generate SSH keys on a Linux machine:
- Start the key generation program by typing “
ssh-keygen -m PEM -t rsa -b 4096” in terminal - Enter the filename you want for the key.
- Enter passphrase if required. (This is optional)
SSH for Windows
Prerequisite: Git Bash
To install Git: Download and initiate the Git installer.
Below are steps to generate ssh keys On the windows machine
- In Windows, press
Start+Rto launch the Run dialog. - Type
C:\Program Files\Git\bin\bash.exeand press Enter. - mkdir keys: Create a directory with name as keys.
- cd keys: Move to that directory.
- Start the key generation program by typing “
ssh-keygen -m PEM -t rsa -b 4096“. - Enter the filename you want for the key.
- Enter passphrase if required it is optional.
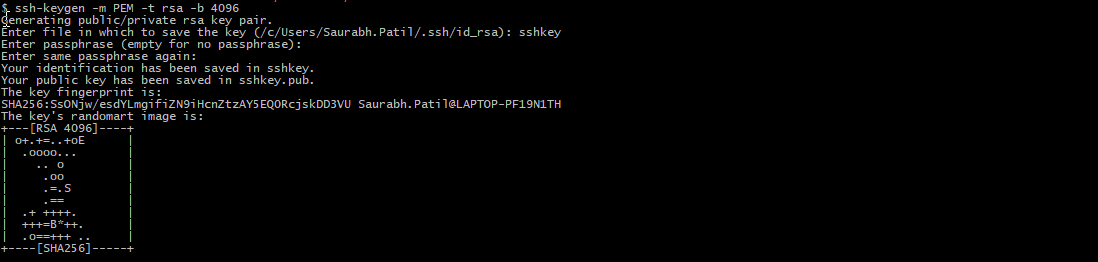
NOTE: keys are generated in the path where you run the ssh-keygen command.
Version Control Account (VCA)
A version control account enables you to integrate your GitHub, Bitbucket, GitLab or Azure DevOps (merge requests) accounts for seamless access. For successful integration, BrowserStack Code Quality needs repository access in GitHub or account, projects, and repositories read access in Bitbucket or read repository and API access in GitLab.
Steps to create a version control account:
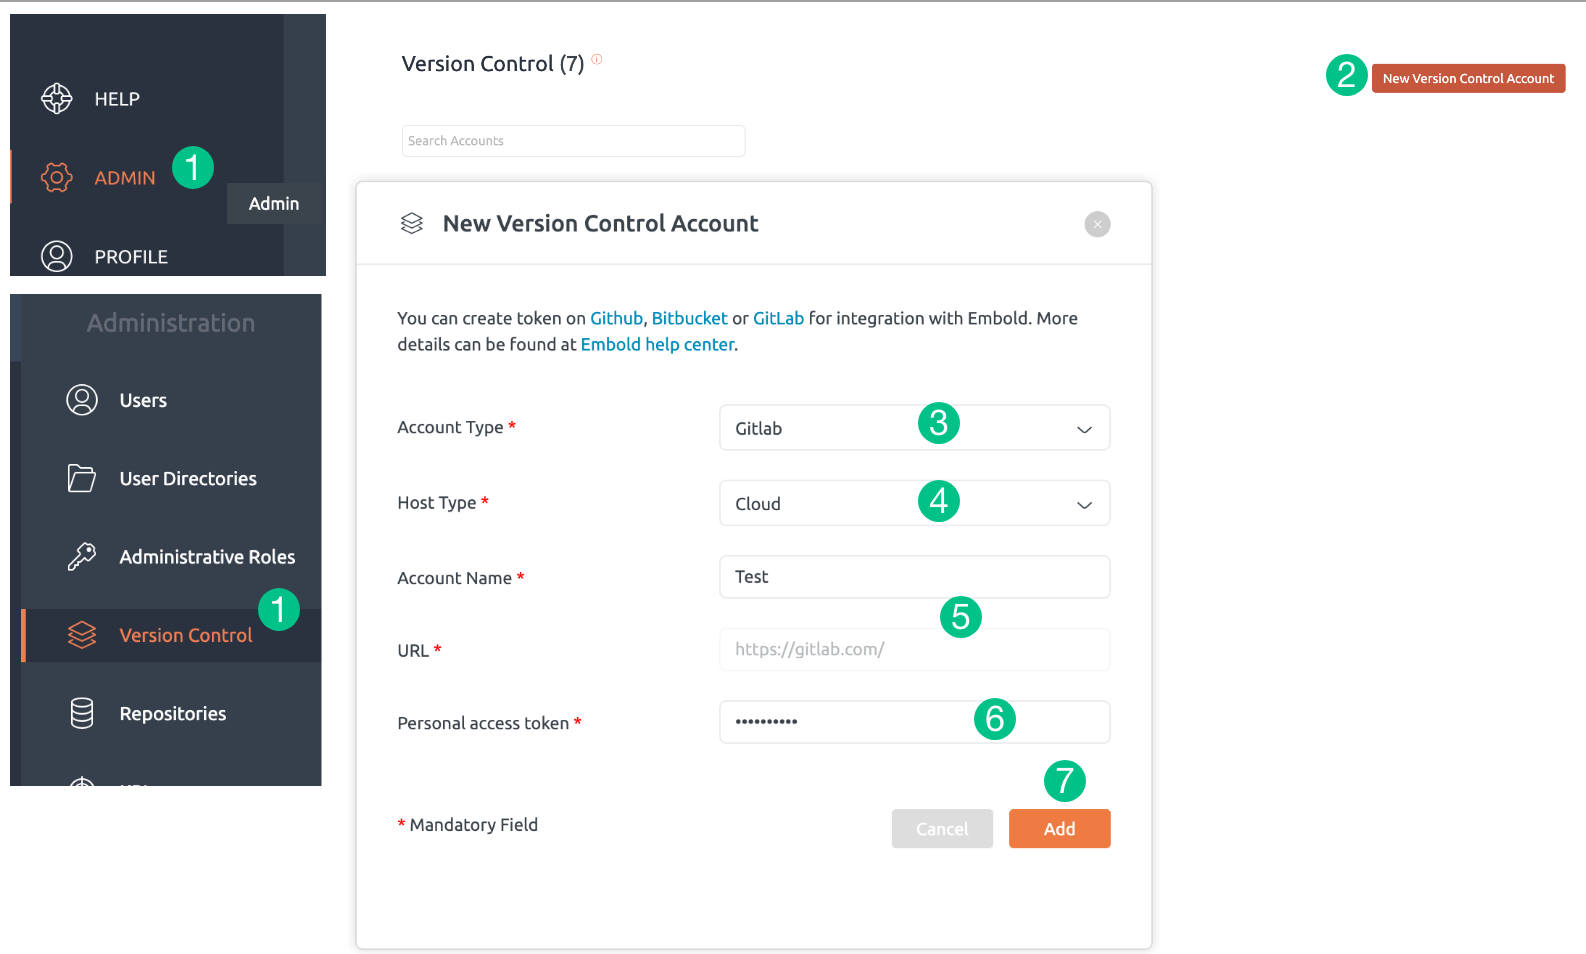
- Navigate to Admin section on left-side navigation pane and click the Version Control tab under Administration.
- Click New Version Control Account pop-up window, select your desired account type. There will be 4 account types: GitHub, Bitbucket, GitLab and Azure DevOps.
- Mention your Host Type. There will be 2 host types: Cloud and On-premise.
- If the host type is selected as ‘Cloud’, the URL will be auto-populated. If the host type is selected as ‘On-premise’, you will need to enter the URL manually.
- Enter your desired Account Name.
- Mention Personal access token. See how to create a GitHub access token. or an app password for Bitbucket or a GitLab access token or an Azure DevOps access token.
- Click on the “Add” button. Your new version control account will be added to the list of version control accounts.
In the future, you may directly link a repository from your selected account type to a project in BrowserStack Code Quality easily as described in this article.
Currently, Azure DevOps can be accessed by personal access token only.
Using VCA to link repositories
Once you integrate your GitHub, GitLab, Bitbucket or Azure DevOps account with BrowserStack Code Quality using Version Control Accounts, you can quickly and easily link repositories to BrowserStack Code Quality projects from such accounts.
Steps to link a repository using version control account:
Inside your project, click Link Repositories tile. You have to click Link Repositories button on the project tile if there are no repositories linked to the project yet.- In the Link Repositories pop-up, under Link New tab, select your version control account as repository type.
- Select desired repository from the listing and fill rest of the fields.
- Click Link Repository button. Selected repository will get linked to the project.
Note: Don’t have a project yet? Learn how to create one here.
Using Azure TFS to link repositories
Azure Team Foundation Server (TFS), newly known as Azure DevOps Server is a source code management system by Microsoft. TFS provides source code management either with Team Foundation Version Control (TFVC) or Git. Azure TFS is available on both cloud as well as on-premise platforms.
Cloud based TFS:
Using cloud TFS, you can add four types of repositories to Embold: Private Git repositories, Open source Git repositories, Private TFVC (Team Foundation Version Control) repositories, and Open source TFVC repositories.
On-premise TFS:
Using on-premise TFS, you can add two types of repositories to Embold: TFVC based repositories and Git based repositories. The Git based repositories can be added to Embold using personal access tokens or SSH keys.
Notes:
- We support Azure TFS repository integration on Windows installer only.
- We do not support Azure TFS integration on Docker.
- Azure DevOps no longer supports alternate credentials since 2020. It is recommended to use Personal Access Tokens instead.
Add Azure TFS cloud repositories
On Azure TFS we can add projects (or repositories) mainly of two types – Git based and TFS based. In Embold, you can add both the types (support for Embold Windows installer only).
Private Git-based repositories
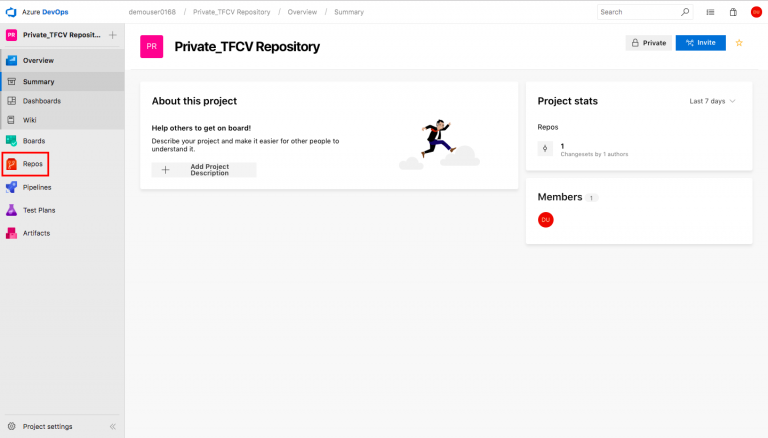
1. Log in to your Azure TFS Server (newly known as AzureDevOps Server)
2. Select the required private Git based project.
3. On the left navigation pane of the welcome page, click Repos.
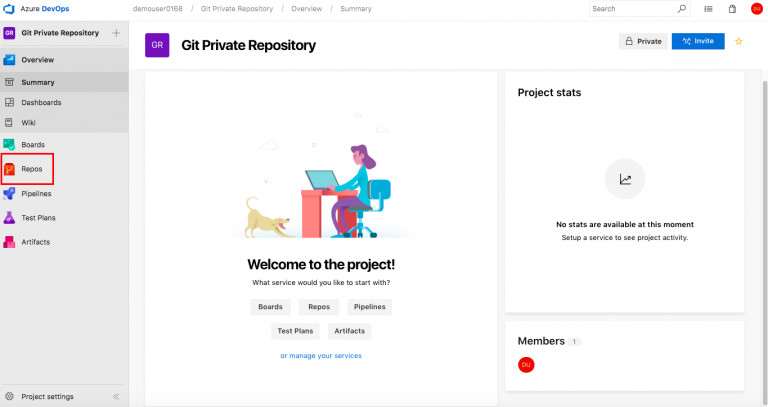
4. From the Repos page, click copy icon to copy the clone URL.
5. Now, go back to your Embold self-managed account and login
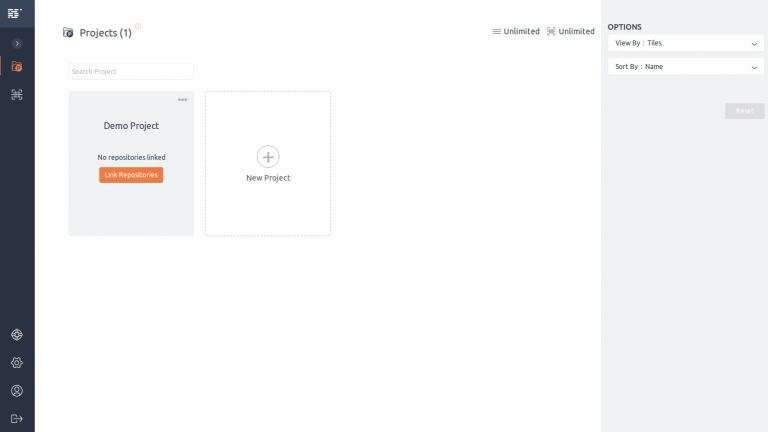
6. On Dashboard, go to your Projects and click Link repositories
7. On the Link Repositories popup, click Repository type as Git.
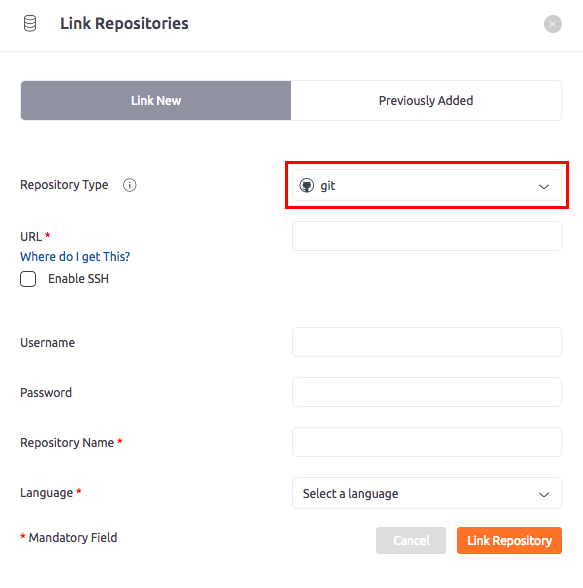
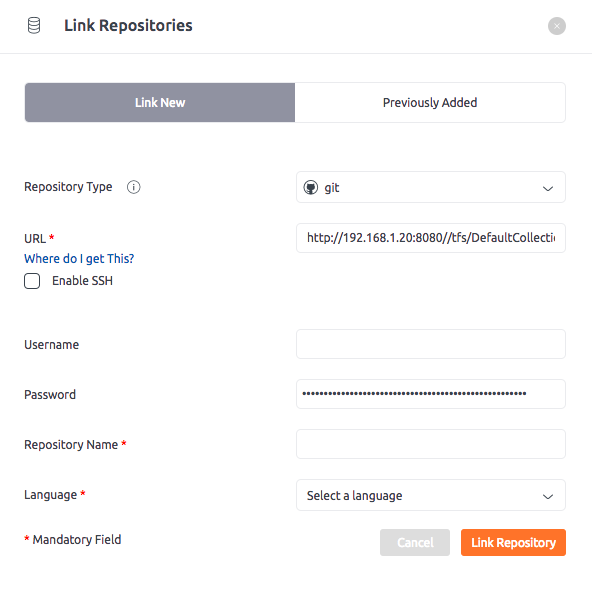
8. In the URL field, paste the URL ( Refer step 4 )
9. Enter your Azure account Username and Personal Access Token (this can be created from your Azure account > Profile > Personal Access Tokens section).
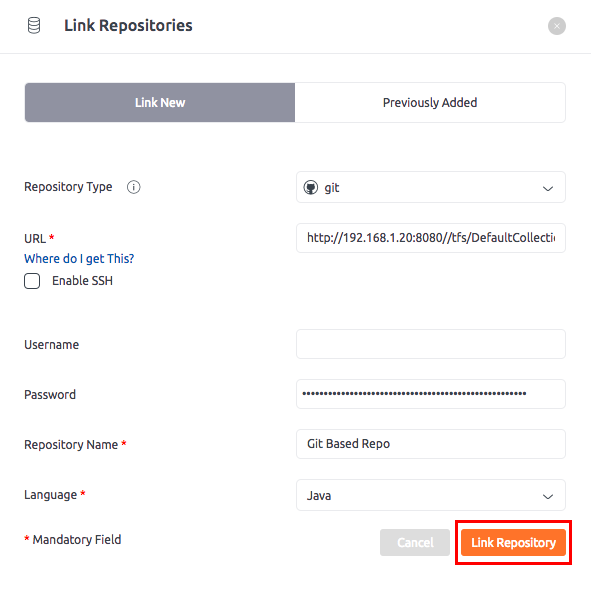
10. In the Repository Name field, enter the repository name.
11. Select the Language from the drop-down list.
12. Click Link Repository.
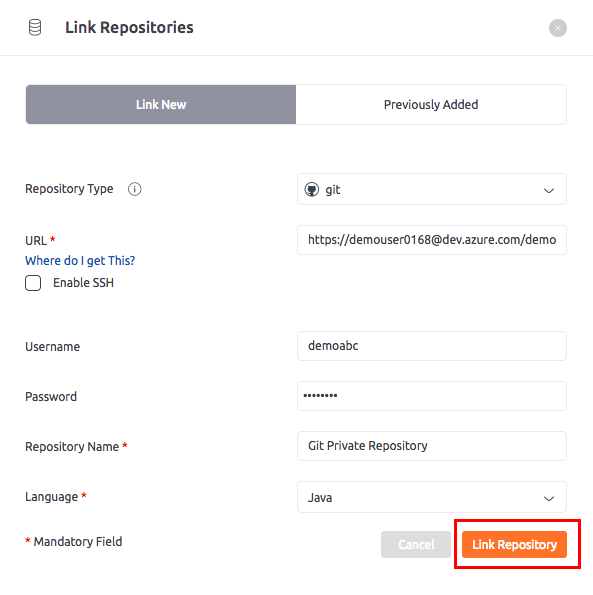
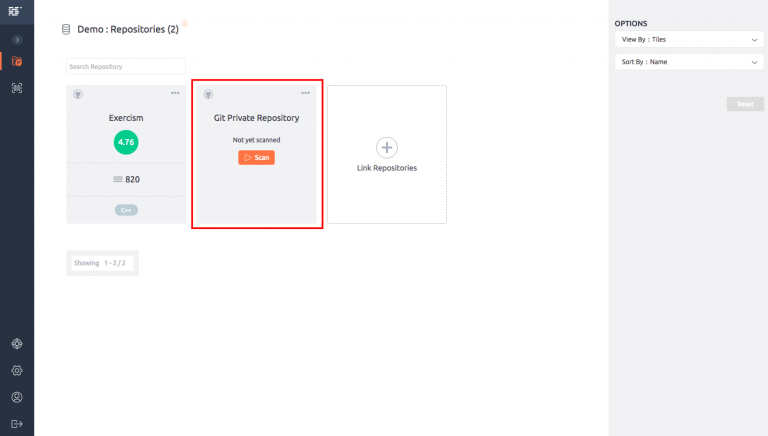
You have successfully added a private Git repository to Embold.
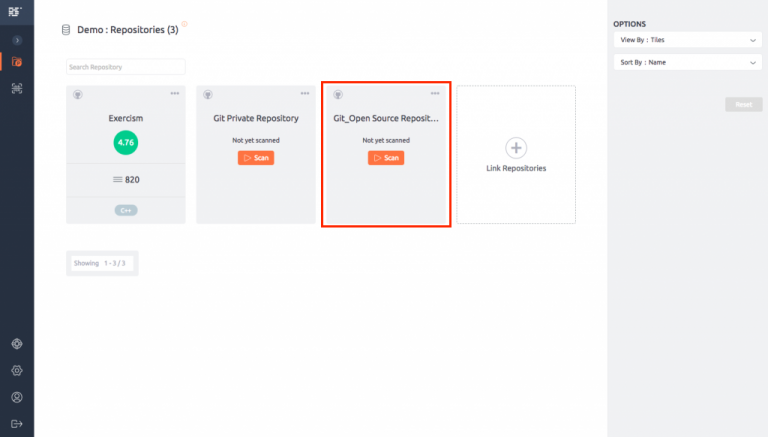
Open source Git-based repositories
Follow same steps as mentioned above for cloud based private Git repositories.
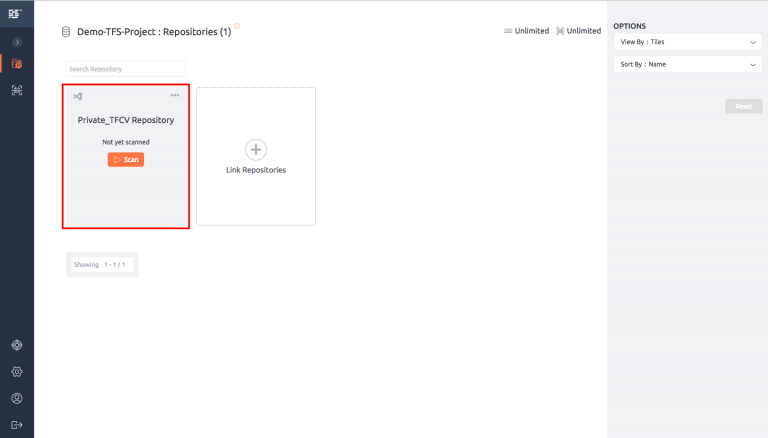
Private TFS-based repositories
1. Log in to your Azure TFS Server (newly known as AzureDevOps Server)
2. Select the required private TFVC based project.
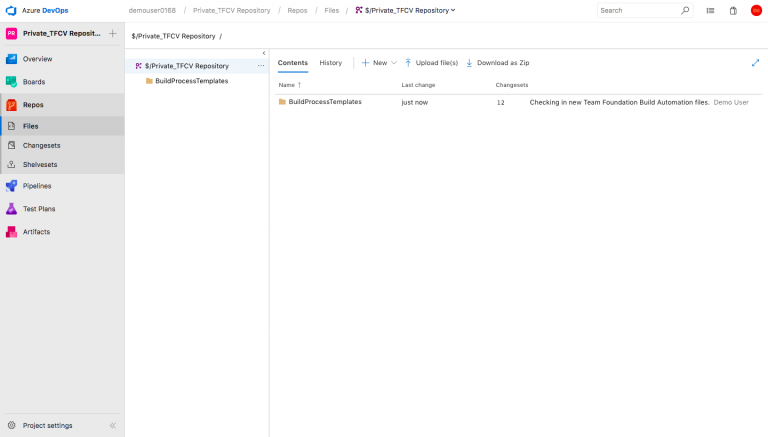
3. On the left navigation pane of the welcome page, click Repos.
4. Now, go back to your Embold self-managed account and login
5. On Dashboard, go to your Projects and click Link repositories
6. On the Link Repositories popup, click Repository type as tfs from the drop-down list.
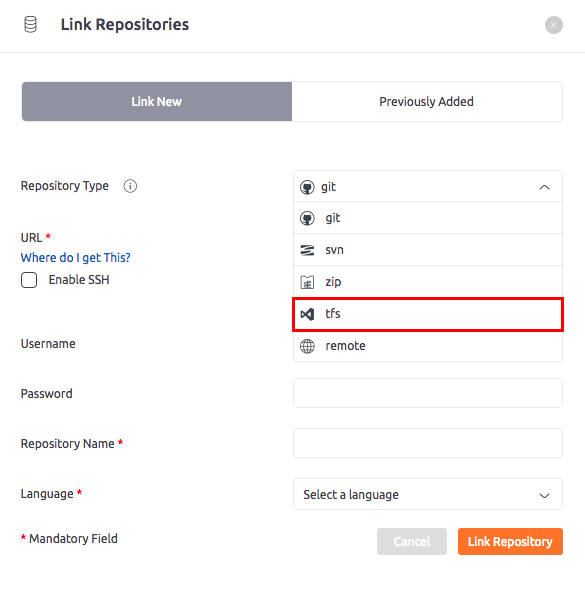
Note: When you select Repository type as tfs you should see inputs fields as shown in the next step below.
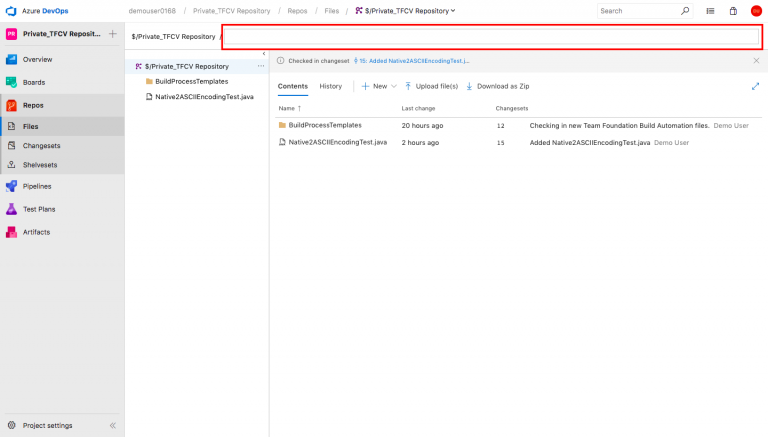
7. Enter URL field as shown in the below screenshot. Note that, you replace “myorg” with your actual “organization_name” under which your TFS project is created.

8. To capture Project path go to your AzureDevOps organisation and click on your project (or refer below screenshot). Move the cursor to the horizontal bar of the right pane and click to view the project path and copy it.
Note: Do not copy the dollar ($) and forward slash (/) sign that appears at the beginning of the project path.
9. Enter your Azure TFS account username (this usually should not be your email). Copy it from your profile section or find it in your personal organisation browsers URL.
10. Enter Personal Access Token – for this your need to go to your Azure TFS account > Profile icon (top-right corner) > Personal Access Tokens page to generate one. Note that, while creating your choose right organisation and provide all access.
11. Then, enter your Repository Name field, choose the language and click Link Repository.
12. You have successfully added a private TFS-based repository to Embold.
Open source TFS-based repositories
Follow same steps as mentioned above for cloud TFS-based private Git repositories.
Add Azure TFS on-premise repositories
On Azure TFS on-premise, we can add projects (or repositories) mainly of two types – Git based and TFS based. In Embold, you can add both the types (support for Embold Windows installer only).
Git-based repositories
There are two ways for adding Git-based repositories to Embold:
– Using Password (instead of Personal Access Token unlike Azure TFS cloud)
– Using SSH public keys
Using Passwords
1. Log in to your Azure TFS Server (newly known as AzureDevOps Server)
2. Select the required private Git based project.
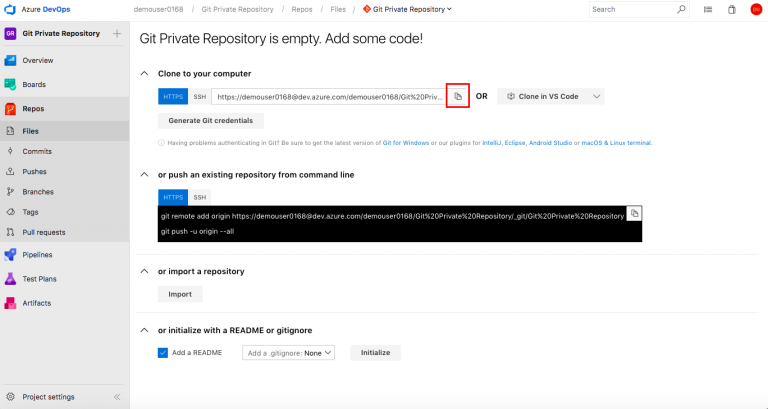
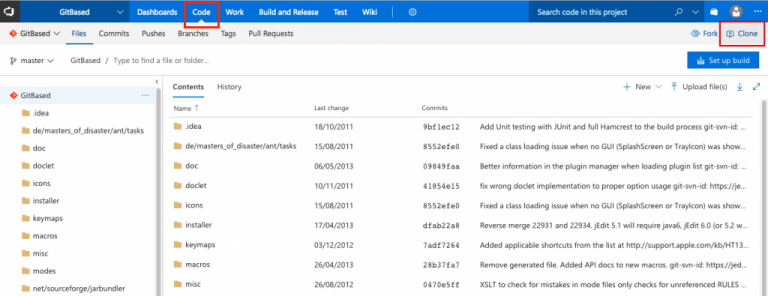
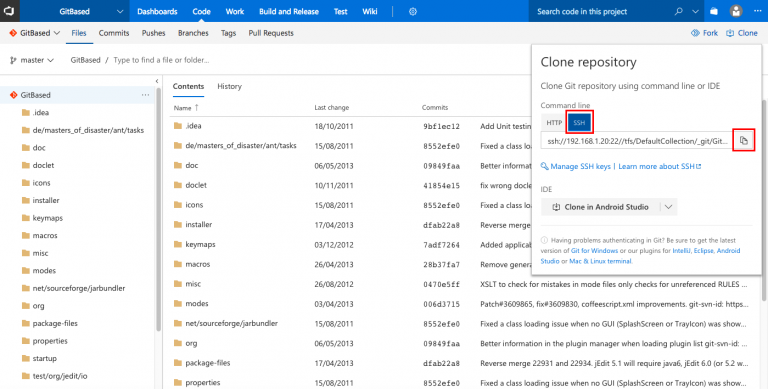
8. Choose Project > GitBased > Code.
9. On the top right corner of the dashboard, click Clone.
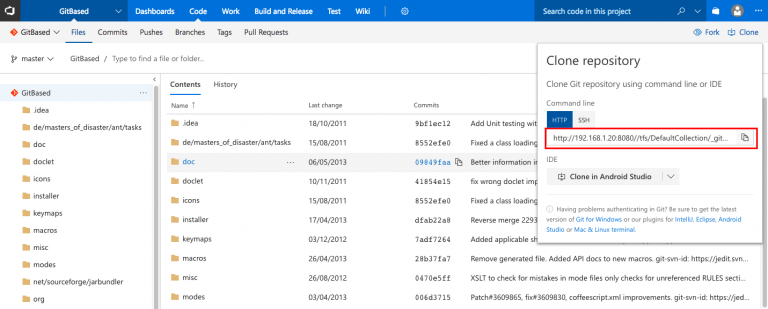
10. Click to copy the clone URL.
11. Log in to your Embold account.
12. Choose Project > Link Repositories.
The Link Repositories popup is displayed.
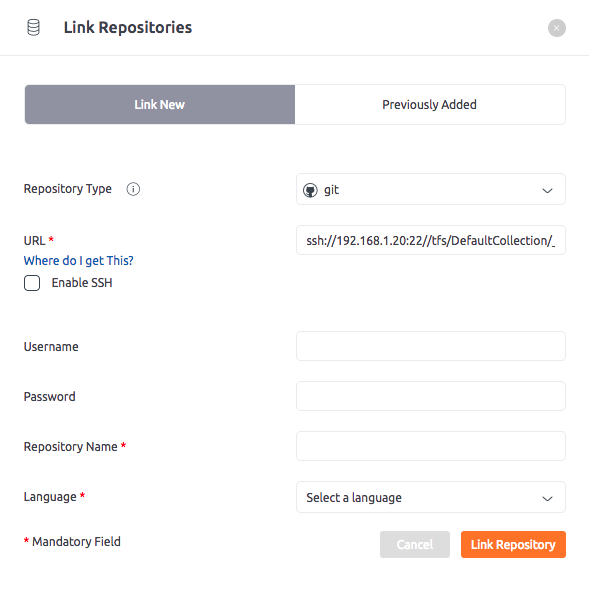
13. Select Repository Type as git.
14. In the URL field, paste the clone URL.
15. In the Password field, enter your Azure TFS account password.
16. In the Repository Name field, enter the repository name.
17. Select the Language from the drop-down menu.
18. Click Link Repository.
You have successfully added a Git-based repository to Embold using username and account password.
Using SSH public keys
Following steps will help you in creating the SSH public key and adding the repositories in Embold using this key.
1. Log in to your Azure TFS Server (newly known as AzureDevOps Server)
2. On the top right corner of the dashboard, choose Account > Security to view the Security page.
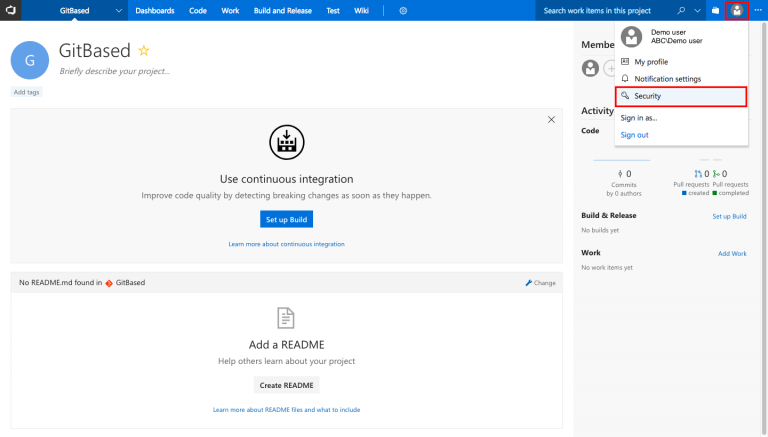
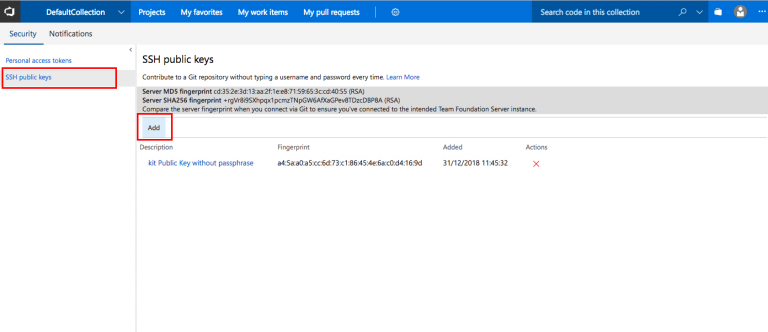
3. On the left pane of the Security page, select SSH public keys.
4. The SSH public keys page is displayed, click Add.
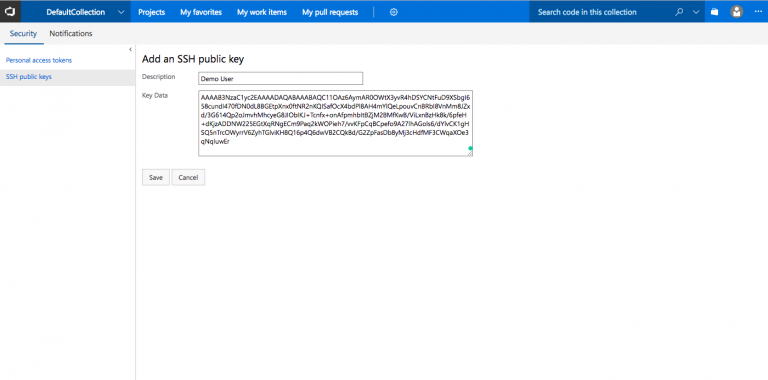
5. On the SSH public key page, add a name for the key in the description field.
6. In the Key Data field, paste your public key.
7. Click Save.
8. Choose Project > GitBased > Code.
9. On the top right corner of the dashboard, click Clone.
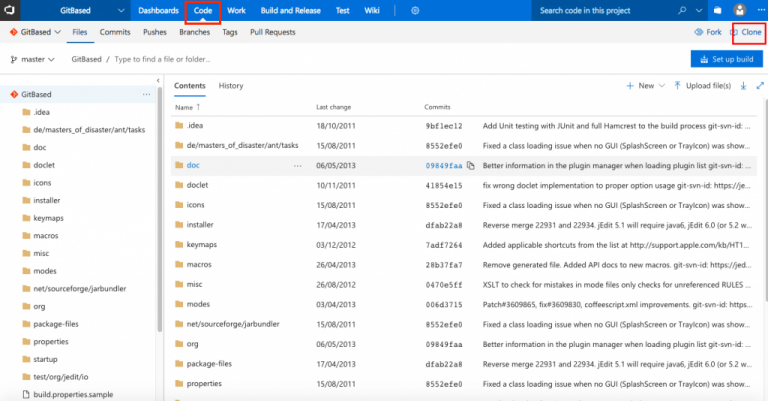
10. Click on the SSH tab.
11. Click to copy the clone URL.
12. Log in to your Embold account.
13. Choose Project > Link Repositories.
14. Select Repository type as Git.
15. In the URL field, paste the clone URL.
16. Check the SSH check box to enable the SSH key field.
17. In the SSH key field, paste your private key and enter passphrase (if applicable).
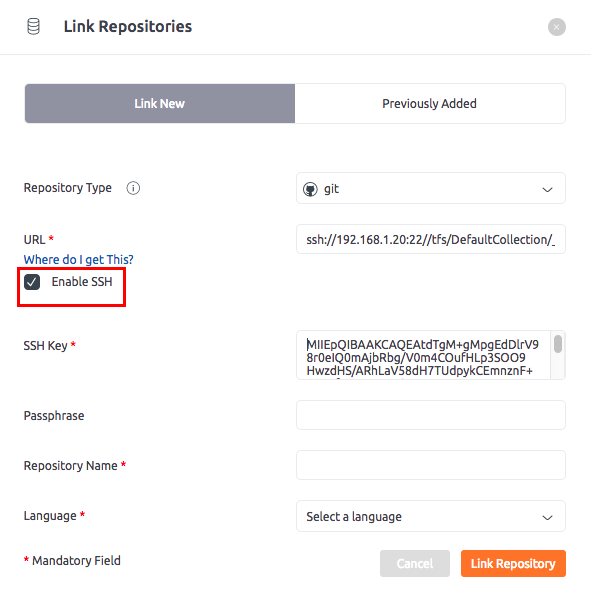
18. In the Repository Name field, enter the repository name.
19. Select the Language from the drop-down menu.
20. Click Link Repository.

You have successfully added a Git repository to Embold using SSH.
Adding TFS-based on-premise repositories
1. Log in to your Azure TFS Server (newly known as AzureDevOps Server)
2. Choose Project >TFVCBased > Code.
3. Copy the URL from the Azure TFS Server Administrator Console (as shown in the screenshot below)
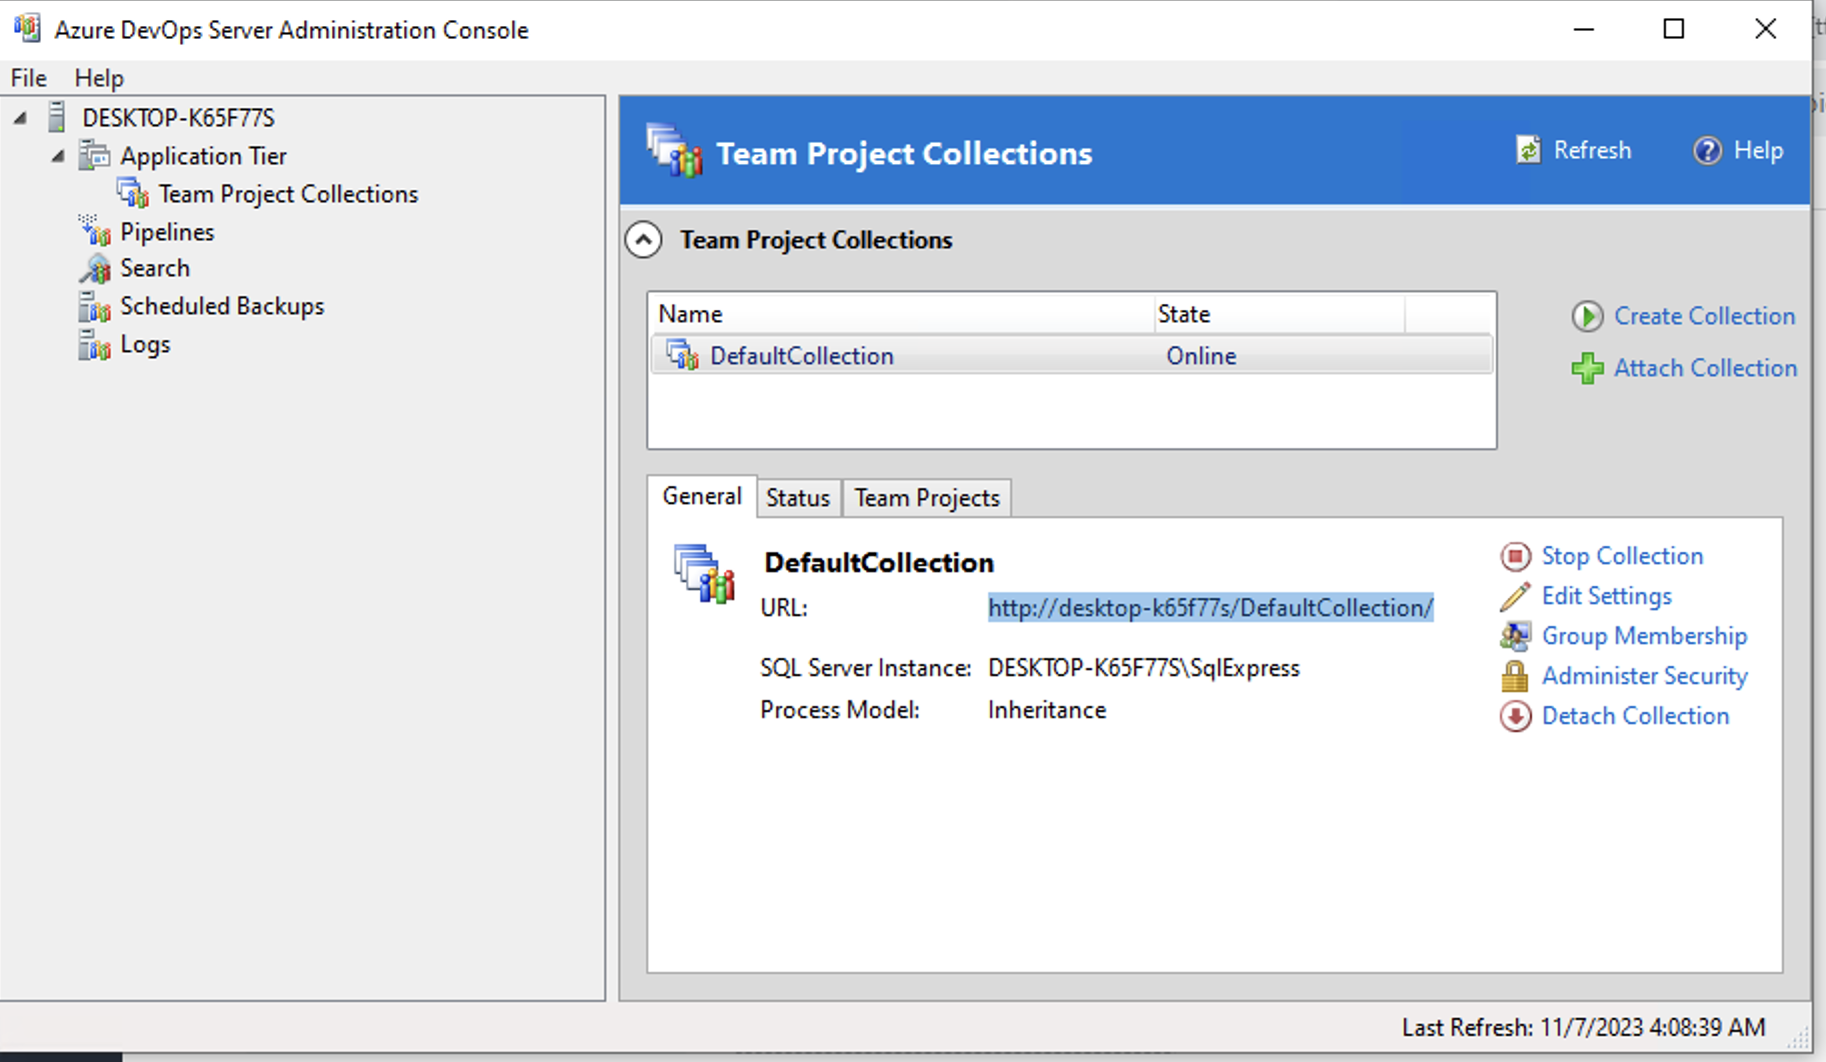
Note: Copy the entire URL with trailing slash and use it at step 7.
4. Log in to your Embold account.
5. Choose Project > Link Repositories.
6. On the Link Repositories popup, click Repository type as tfs from the drop-down list.
7. In the URL field, paste the URL (copied at step 3).
8. Go to your Azure TFS on-premise server and click below the menu bar to view the Project path, copy it. Note that, Do not copy the dollar ($) and forward slash (/) sign that appears at the beginning of the project path. (refer screenshot below)

9. In the Project path field, enter the Project path (copied at step 8 above).
10. In the Username and Password field, enter your Azure TFS account username and password. Note that, for Azure TFS on-premise server instead of Personal Access Token use Password.
Note: You can add machine based and domain-based credentials in the user name and password field.
11. In the Repository Name field, enter the repository name.
12. Select the Language from the drop-down menu.
13. Click Link Repository.
You have successfully added TFS-based on-premise repository to Embold using on-premise TFS.
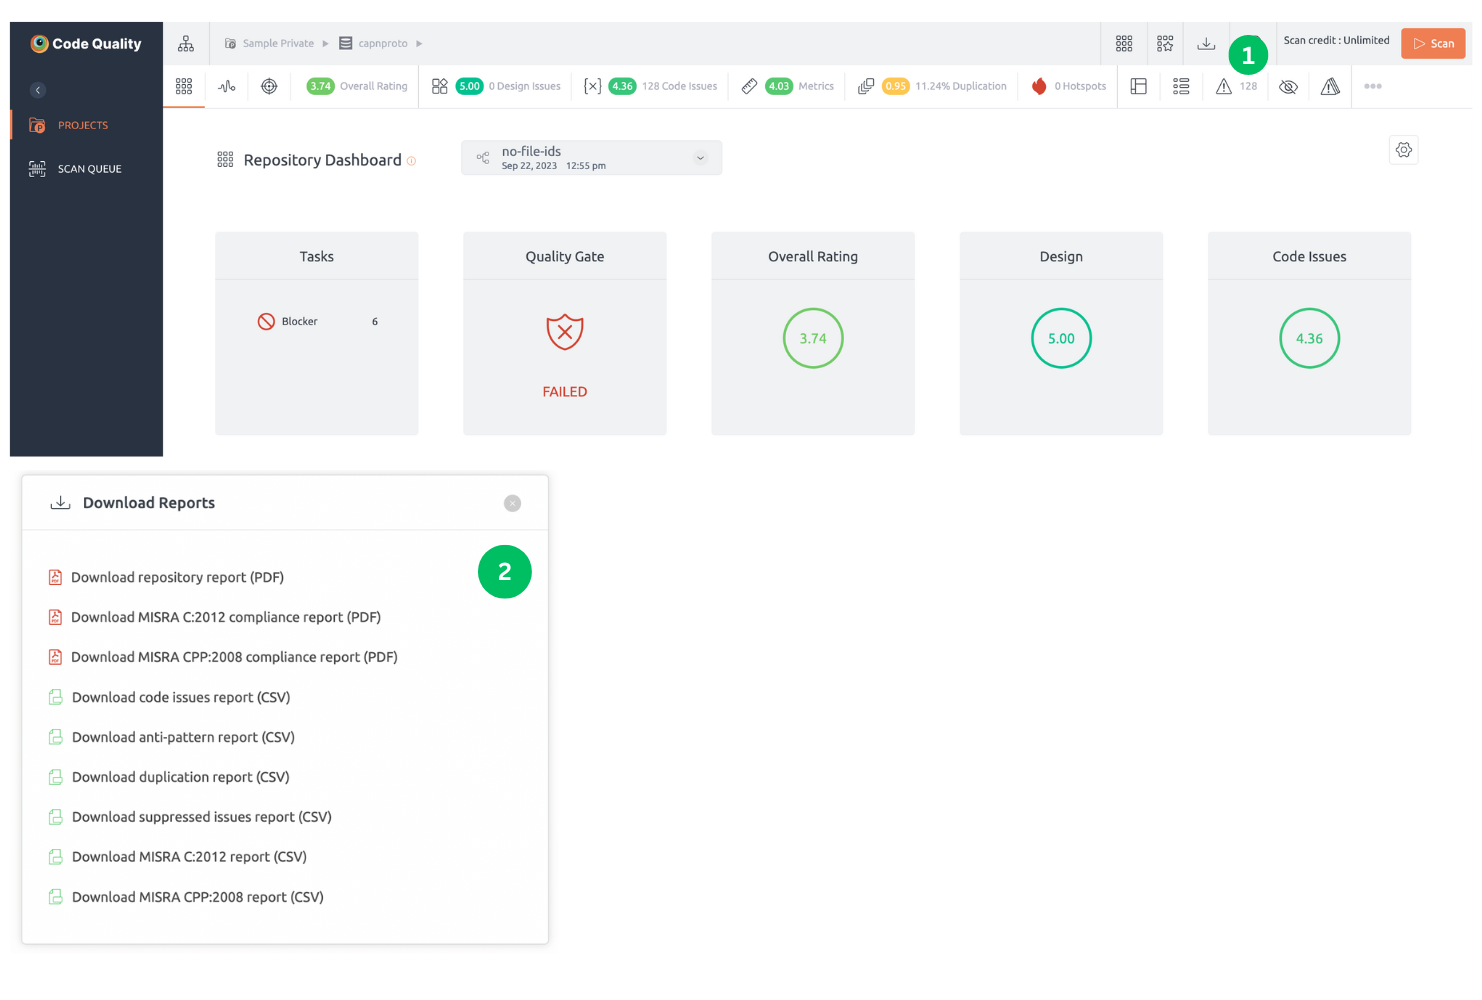
Download Repository Report
Below are the steps to download the repository report:
- Go to Projects > Repositories. When user clicks on the respective repository, the Repository dashboard will be displayed.
- Click on the “Download Repository Report” icon.
- “Download Reports” pop-up window will be displayed to the user.
| Report | Type of issues | Format | Description | Example |
|---|---|---|---|---|
| Download Repository Report | -- | This reports contains overall statistics of the repository. | ||
| MISRA Reports | code issues | PDF CSV | Compliance Report: This report contains statistics, details of scan summary, issue name, graphical representation of violations and so on that are tagged against MISRA. MISRA Report: This report contains the information about the issue details that are tagged against MISRA. | MISRA CPP:2008 compliance report MISRA CPP:2008 report |
| Code and Design Reports | code issues, design issues | CSV | This report contains the information about the issue details. | anti-pattern report |
Badges
What are badges?
Badges are the uniform way of displaying the tags to the repository to ensure better quality code. A list of badges is included in the Readme.MD file of your repository.
Building badges helps to improve the readability of the repository. They provide visual information that portrays different colors.
BrowserStack Code Quality Badges
BrowserStack Code Quality badges can be used to promote the health of your repository on external websites like GitHub and Bitbucket.
Currently, BrowserStack Code Quality supports two badges:
- Rating – This badge shows the Overall Rating of your repository . Know more about BrowserStack Code Quality ratings here.

- Quality Gate: This badge shows whether the repository has passed or failed the quality standards set by you. Know more about quality gate here.

How to add badges to your repository?
To see badges, add this command to the Readme.MD file in your repository.

Read more information about generating repository uid and BrowserStack Code Quality Access Token.
Below are the sample values displayed as an example:
## BrowserStack Code Quality: Quality Gate

Check out badges-related API documentation here.